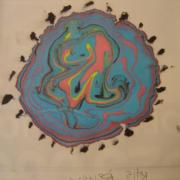
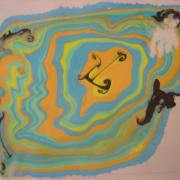
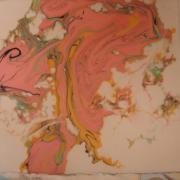
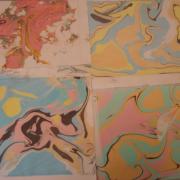
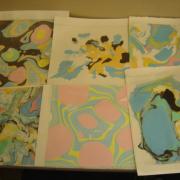
Ink floating is a paper marbling technique that dates back centuries, from the calligraphic panels of the Islamic world to the suminagashi paper of Japan. Its history is common to the bookmaking techniques of 19th-century Europe, and it still has many applications today.
Ink floating, also known as erbu or cloud art, is a great activity that can be done with a variety of age groups. It works especially well with teenagers, who often enjoy the satisfaction of making original and colorful works of art within minutes. These one-of-a-kind monoprints are surprisingly beautiful and easy to create.
Budgeting
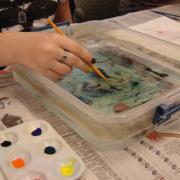
There are a variety of ways to create suminagashi prints in the tradition of Japanese marbling. This technique has been perfected using several different methods, from water mixed with methocel, to shaving cream and food coloring. One of the best and most cost-effective marbling kits available today is sold by Dick Blick. The Aitoh Boku-Undo Suminagashi Marbling Kit retails at $14.95 and contains six colors: red, blue, yellow, black, green and orange. One kit could easily last several library programs, as it only takes a few drops of colored ink to create multiple prints.
In addition to the marbling kit, your library will need to purchase plastic storage containers for water and rectangular six-well palettes for the ink. The palettes can be purchased as cheap as $0.58 apiece from Dick Blick or Utrecht Art Supplies. The containers can be purchased from the Dollar General Store or Wal-mart and will cost between $3 and $5 apiece. The Sterilite 6.2 Qt. Modular Latch Box is a good-sized container to purchase. Any similar storage container resembling 11-by-14 inches will work just as well. Your library should purchase as many containers as anticipated class size. Students can share the materials and rotate in and out of the water stations if your anticipated class size is large.
Lastly, paintbrushes and paper will need to be purchased to create the prints. Brushes can be purchased at your local art or retail store. The best type of paper to use is called copperplate paper. It can be purchased from Dick Blick or a similar vendor. Sheets of copperplate paper cost $3.43 to $4.16 per sheet. While this may seem slightly expensive, the sheets are rather large (22-by-30-inch) and can be cut into smaller squares for the program. The paper is also very absorbent, much like a sponge. It may be difficult to find a cheaper alternative that works as nicely.
Day-of-event Activity
In addition to the art materials, it is necessary to consider your room set-up in advance. You will need tables large enough to hold the plastic containers. Students can either sit or stand around their ink floating station. Tables should be covered in plastic tablecloths or newspaper so as not to make a mess. It is also helpful to have paper towels on hand. Thay way, students can keep their brushes clean as they change colors.
Most importantly, staff will need to have access to a sink so students can then refill their water container with fresh water. This will happen after several prints when the ink begins to settle to the bottom or mix with other colors.
Program Execution
It is important to provide resources about ink floating. Librarians can find many examples in books and online that demonstrate its use throughout history. These examples can be used to discuss how this unique art form developed, including its use in poetry, calligraphy and book arts.
Two introductory videos that demonstrate the ink floating process include “Simple Suminagashi- Lesson Plan” by Blick Art Materials (embedded above) and “Marbling Magic: An Introduction to the Art of Marbling.” The former demonstrates just how easy it is to make colorful prints from the kits, while the latter demonstrates the homemade method of using powdered alum and carrageenan.
Wendy Addison Medeiros’s book "How to Create Traditional and Contemporary Designs on Paper and Fabric" is a perfect companion to these how-to videos. Medeiros provides recipes and step-by-step marbling instructions for acrylic, tempera, gouache and oil paints. The book also contains great do-it-yourself advice for making marbling tools such as whisks, rakes and combs. Other chapters describe marbling objects like hard-boiled eggs and marbled patterns like the peacock, zebra and curtain. Medeiros’s book is a must-have for those librarians seeking to experiment beyond the basic kit.
Aside from its use in literary arts, marbling has many uses today. A video titled “Swirling (Yellow and Black Custom Guitar)” demonstrates its use on musical instruments and can add an interesting technology component to the program. This video is one of many accessible via the YouTube channel DeanSwirled that demonstrates the marbling process on bicycle frames, motorcycle helmets, wall canvases and more!
Perhaps one of the strangest examples of the marbling process includes the video titled “How to Dip Skulls with Spray Paint.” The video demonstrates how the marbling process can be applied using spray paint and water on a deer skull. It is also accessible via YouTube, along with videos about marbled nail art and other odd applications.
All of these videos are sure to interest program participants, as they can see the range of creativity in such a simple process. Librarians can play some of the videos beforehand or as students work on their prints. This will provide balance between the instructional components of the lesson and the time devoted to creative expression.
Advice
Ink floating requires an initial investment for materials, but most of the materials can be reused over time. The ink and paper are consumable items, and paintbrushes will need to be replaced as they get worn or damaged. The plastic storage containers and rectangular palettes will last a lifetime and make a great investment.
As a teen services librarian, I have organized this program with various organizations that serve young adults. Additional programs have included after-school activities and summer workshops. Based on the success of these programs, I highly recommend trying it with the teenagers in your community.
Lastly, it is important to make connections between what students are creating and the world around them. Highlight your library programs with resources that engage students beyond the arts and crafts of a particular project. Some of these resources are mentioned above, but there are many more available that provide learning opportunities for students and make us better educators.

